

When I first embarked on my blogging journey, one of the most crucial steps was selecting the perfect domain name. This name would not only represent my blog but also serve as my online identity. I wanted something memorable, easy to spell, and reflective of the content I planned to share.
After brainstorming various ideas, I realized that a good domain name should ideally be short and catchy. I spent hours playing with different combinations of words, ensuring that it resonated with my target audience while also being unique enough to stand out in a crowded digital space. I also learned the importance of checking the availability of my chosen domain name.
There’s nothing more disheartening than falling in love with a name only to find out it’s already taken. I used various domain registration sites to explore alternatives and variations. Eventually, I settled on a name that encapsulated my blog’s essence and was available for registration.
This process taught me that a well-thought-out domain name can significantly impact my blog’s branding and visibility, making it a foundational step in my blogging adventure.
Key Takeaways
- Choose a domain name that is easy to remember, relevant to your blog’s content, and reflects your brand.
- Select a hosting provider that offers reliable uptime, good customer support, and scalable hosting plans to accommodate your blog’s growth.
- Install WordPress, a user-friendly and customizable platform, to easily manage and update your blog’s content.
- Customize your blog’s design by choosing a responsive theme, customizing colors and fonts, and adding a logo to create a unique and professional look.
- Add essential plugins such as SEO tools, security features, and social media integration to enhance your blog’s functionality and user experience.
Selecting a Hosting Provider
Research and Comparison
I began by researching various hosting providers, reading reviews, and comparing their offerings. I wanted a reliable service that could handle my blog’s traffic as it grew while also providing excellent uptime and speed. After careful consideration, I opted for a hosting provider that offered a balance of affordability and robust features.
Key Features and Support
I appreciated their user-friendly interface and the availability of customer support, which gave me peace of mind as a beginner. Additionally, I looked for options that included one-click WordPress installation, as this would simplify the process of getting my blog up and running.
A Solid Foundation for Success
Ultimately, choosing the right hosting provider was essential in laying a solid foundation for my blog’s performance and accessibility.
Installing WordPress
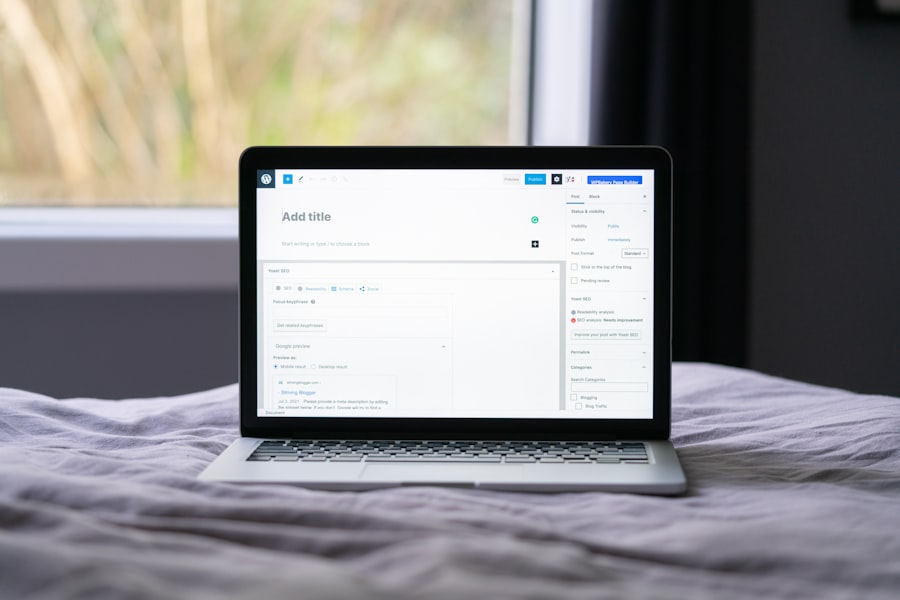
With my domain name registered and hosting provider selected, I was ready to install WordPress. This step felt like a significant milestone in my blogging journey. Most hosting providers offer a straightforward installation process, often with one-click options that make it incredibly easy for beginners like me.
I followed the prompts provided by my hosting service, and within minutes, I had WordPress installed and ready for customization. As I logged into my new WordPress dashboard for the first time, I felt a mix of excitement and nervousness.
I took some time to familiarize myself with the various settings and options available. From adjusting site settings to exploring themes and plugins, I realized that WordPress offered immense flexibility for creating a unique blog.
This initial installation phase was not just about setting up a platform; it was about laying the groundwork for my creative expression.
Customizing Your Blog’s Design
| Metrics | Value |
|---|---|
| Number of blog themes available | 50 |
| Customization options | Color, font, layout |
| Responsive design | Yes |
| Custom CSS support | Yes |
Once WordPress was installed, the next step was customizing my blog’s design to reflect my personality and brand. I understood that the visual appeal of my blog would play a significant role in attracting and retaining readers. I began by exploring various themes available in the WordPress repository.
There were countless options, each offering different layouts and styles. After much deliberation, I chose a theme that resonated with my vision—clean, modern, and easy to navigate. Customization didn’t stop at selecting a theme; I delved into adjusting colors, fonts, and layouts to create a cohesive look.
I wanted my blog to feel inviting and engaging while ensuring that it aligned with the content I planned to share. Additionally, I added essential elements like a logo and header image to enhance brand recognition. This process of design customization was not just about aesthetics; it was about creating an environment where my readers would feel comfortable exploring my content.
Adding Essential Plugins
As I continued to develop my blog, I quickly learned about the importance of plugins in enhancing functionality. Plugins are like apps for WordPress; they can add features ranging from SEO optimization to social media integration. I started by identifying essential plugins that would improve user experience and streamline my blogging process.
For instance, I installed an SEO plugin to help optimize my content for search engines, ensuring that my posts would reach a wider audience. In addition to SEO tools, I also sought out plugins for social media sharing and analytics. These tools would allow me to track visitor engagement and understand which content resonated most with my audience.
As I explored the vast array of plugins available, I realized that choosing the right ones could significantly enhance my blog’s performance and usability. This phase of adding plugins was exciting; it felt like equipping my blog with powerful tools to help it thrive in the digital landscape.
Creating Your First Blog Post

With everything set up and ready to go, it was finally time to create my first blog post. This moment felt monumental; it was the culmination of all the planning and preparation I had undertaken thus far. As I sat down to write, I reflected on what message or story I wanted to share with my readers.
I decided to introduce myself and explain the purpose of my blog—what topics I would cover and what readers could expect from me. Writing that first post was both exhilarating and nerve-wracking. I poured my heart into crafting engaging content while ensuring it was informative and relatable.
After several drafts and revisions, I finally hit the publish button with a mix of pride and anxiety. Sharing my thoughts with the world felt liberating yet daunting at the same time. This initial post marked the beginning of my blogging journey—a space where I could express myself freely and connect with others who shared similar interests.
Setting Up Categories and Tags
As I continued to create content for my blog, I recognized the importance of organizing my posts effectively through categories and tags. These tools would not only help me keep track of my content but also enhance user experience by making it easier for readers to find related topics. I took some time to brainstorm relevant categories that aligned with the themes of my blog—ensuring they were broad enough to encompass various subtopics while still being specific enough to guide readers.
Once I established categories, I began tagging individual posts with relevant keywords that would help improve searchability within my blog. This process required careful thought; I wanted to ensure that each tag accurately represented the content while also being terms that potential readers might search for online. Setting up categories and tags became an essential part of structuring my blog, allowing me to create a more organized and user-friendly experience for visitors.
Understanding SEO Basics
As my blog began to take shape, I realized that understanding SEO (Search Engine Optimization) basics was crucial for driving traffic to my site. Initially, SEO seemed like a complex topic filled with jargon and technicalities, but as I delved deeper into it, I discovered its significance in helping my content reach a broader audience. I started by learning about keyword research—identifying terms that potential readers might use when searching for topics related to my blog.
I also familiarized myself with on-page SEO techniques such as optimizing titles, meta descriptions, and image alt texts. These elements play a vital role in how search engines rank content, making it essential for me to implement them effectively in each post. Additionally, I explored off-page SEO strategies like building backlinks through guest posting and engaging with other bloggers in my niche.
Understanding these basics empowered me to create content that not only resonated with readers but also had the potential to rank well in search engine results.
Integrating Social Media Sharing
Recognizing the power of social media in promoting content, I made it a priority to integrate social media sharing options into my blog. This step was vital for expanding my reach beyond just organic search traffic; social media platforms offered an avenue for connecting with potential readers directly. I installed social media sharing plugins that allowed visitors to easily share my posts on platforms like Facebook, Twitter, and Instagram.
I also created dedicated social media accounts for my blog where I could share updates, engage with followers, and promote new content. This integration not only helped drive traffic back to my blog but also fostered a sense of community among readers who shared similar interests.
Monetizing Your Blog
As my blog grew in content and readership, thoughts of monetization began to surface. While sharing my passion was fulfilling, the idea of turning it into a source of income was enticing as well. I started exploring various monetization strategies such as affiliate marketing, sponsored posts, and ad placements.
Affiliate marketing stood out as an appealing option; by promoting products or services relevant to my audience, I could earn commissions on sales generated through my referral links. I also considered creating digital products like e-books or online courses based on topics within my niche. This approach would allow me to leverage my expertise while providing value to readers seeking more in-depth knowledge on specific subjects.
As I researched different monetization avenues, it became clear that building trust with my audience was paramount; authenticity would be key in successfully integrating these strategies without compromising the integrity of my content.
Promoting Your Blog
With monetization strategies in mind, promoting my blog became an essential focus moving forward. Initially, I relied on organic traffic through SEO efforts and social media sharing; however, as time went on, I recognized the need for more proactive promotion methods. One effective strategy was collaborating with other bloggers in similar niches through guest posting or joint projects—this not only expanded my reach but also introduced me to new audiences who might be interested in my content.
I also explored email marketing as a means of keeping readers engaged and informed about new posts or updates on my blog. Building an email list allowed me to connect directly with followers who were genuinely interested in what I had to say—creating a loyal community around my brand. Additionally, participating in online forums or groups related to blogging provided opportunities for networking and sharing insights while promoting my content organically within those communities.
In conclusion, embarking on this blogging journey has been an enriching experience filled with learning opportunities at every turn. From choosing a domain name to promoting my blog effectively, each step has contributed significantly to shaping not only the blog itself but also me as a writer and creator in this digital landscape.
If you’re interested in creating a WordPress blog but want to ensure it is accessible to all users, you may want to check out this article on accessible website design. This article provides valuable tips and strategies for making your website inclusive and user-friendly for individuals with disabilities. It’s important to consider accessibility when designing your blog to reach a wider audience and provide a positive user experience for all visitors.
FAQs
What is WordPress?
WordPress is a popular content management system (CMS) that allows users to create and manage their own websites and blogs. It is known for its user-friendly interface and customizable features.
Why should I start a WordPress blog?
Starting a WordPress blog allows you to share your ideas, expertise, and creativity with a global audience. It can also be a platform for building a personal brand, promoting a business, or generating income through advertising and affiliate marketing.
What do I need to start a WordPress blog?
To start a WordPress blog, you will need a domain name, web hosting, and the WordPress software. You can choose a domain name that reflects the topic or niche of your blog, select a reliable web hosting provider, and install WordPress on your hosting account.
How long does it take to start a WordPress blog?
With the right tools and resources, you can start a WordPress blog in under 30 minutes. This includes setting up a domain, purchasing web hosting, and installing WordPress on your hosting account.
Can I customize the design of my WordPress blog?
Yes, WordPress offers a wide range of customizable themes and plugins that allow you to personalize the design and functionality of your blog. You can choose from free and premium themes, and add plugins to enhance features such as social media integration, SEO optimization, and e-commerce capabilities.
Is it easy to manage a WordPress blog?
WordPress is designed to be user-friendly, with an intuitive dashboard that allows you to create and manage content, customize the design, and monitor site performance. Additionally, there are plenty of online resources and tutorials available to help you navigate the platform.


